Learn the safe and effective method for how to clean a Great Dane’s ears, ensuring your gentle giant stays comfortable and infection-free. This article provides a step-by-step guide to maintaining the ear health of your Great Dane.
Table of Contents
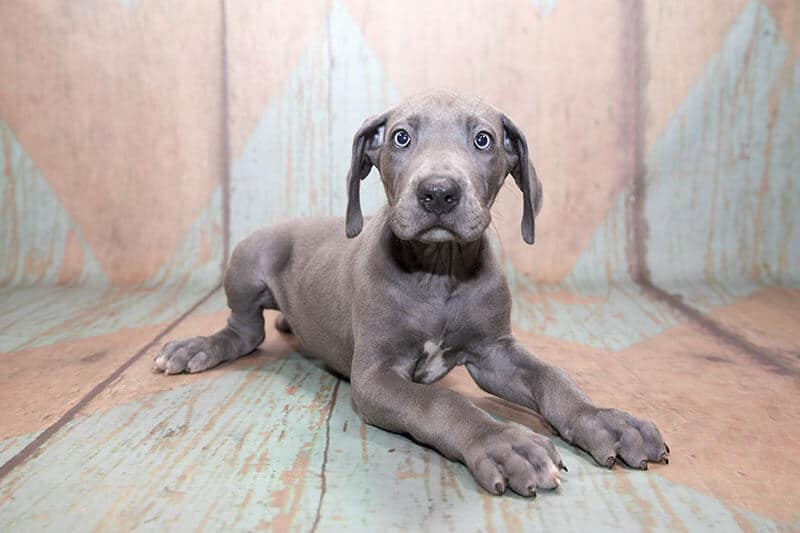
Why Great Danes Need Their Ears Cleaned
Unfortunately, your Danes ears will pick up a surprising amount of gunk whether they are cropped or natural. Unlike human ear canals which are closer to horizontal, Great Dane ear canals are more vertically aligned.
This leads to a predisposition for collecting additional debris and moisture. Infections can happen if this is allowed to accumulate and not removed.
In the event you notice your Dane intently scratching at their ears, then it’s a good sign that you’re overdue for a cleaning session. You should plan to develop a consistent routine based on your veterinarian’s recommendation, however, once per week is a common starting point.
Another common sign that your Great Dane needs their ears cleaned is when they shake their heads aggressively in an attempt to “scratch the itch”. For dogs with uncropped ears, this creates a loud slapping sound as can be seen and heard in the video below.
Onto the good news – ear cleaning is not a complicated process!
While Great Dane ear canals can be quite deep compared to other breeds, the extra space actually helps you to be more precise in cleaning. This helps lessen the chance of accidental damage to the eardrum and makes the experience easier for both parties.
As with many new experiences, your Dane will likely be apprehensive the first couple of times that you clean their ears. However, most grow to enjoy the ear-cleaning process with time. Particularly if food treats or other high-value rewards are provided at the end!
Great Dane Ear Cleaning Supplies
Listed below are useful supplies for the ear-cleaning process that we find particularly effective.
Certain supplies such as cotton swabs and towels can be found in almost any drugstore, so we skipped adding links for them.
- Ear wipes
- My ear favorite cleaning solution!
- Cotton swabs
- Towel (for clean up)
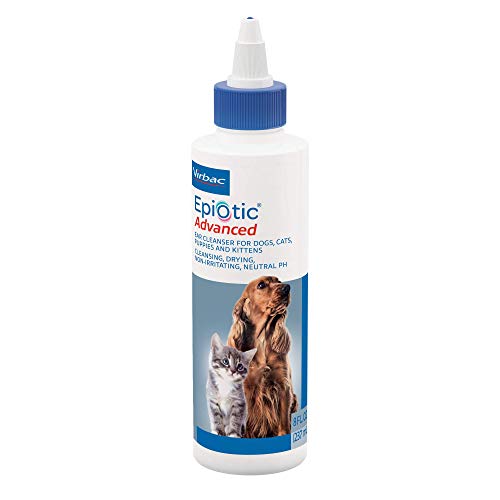
A well-tolerated, efficient ear cleanser that facilitates the removal of cellular debris and excessive wax, as well as the drying of the ear canal. The inclusion of monosaccharides has a soothing effect, as well as, limiting the bonding of microorganisms to the skin surface.
Step 1: Flush the Ear
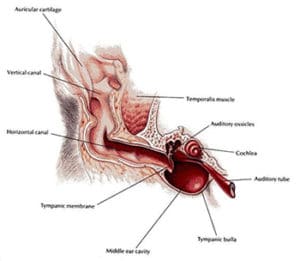
Gently pull back the ear and squeeze a liberal amount of cleaning solution into the ear canal (as shown in the image below). The intention is to fill the ear canal until you are able to see a visible fluid line. This means that you’re filling the entirety of the horizontal canal, and enough of the vertical canal until you see the fluid.
Watch out as your Dane may try to shake their head immediately after pouring the cleaning solution in!
While still holding the ear, gently massage the base of the ear to help the solution work its way downwards. This will also help to loosen any dirt or debris that may have built up around these areas.
You should be able to hear an audible sucking sound while massaging the area below its ear. The massaging pressure creates a vacuum inside the ear canal that pulls out debris and anything else that may have accumulated.
When complete your Dane will likely want to vigorously shake their head to remove the liquid from their ear. Stand back and have a towel handy at this point to help limit the mess. I recommend performing this cleaning process in a bathroom, yard, etc… is recommended if you don’t enjoy cleaning up
Step 2: Remove the Gunk
Use a cotton swab or ear wipe to gently clean the ear and remove any remaining cleaning solution or debris. After the ear massage and head shaking, the gunk should have already started working its way out. Make sure to clean in and around the many ridges of the canal to clear away any remaining residue.
Larger materials such as cotton swabs are useful at this point to help prevent pushing dirt and bacteria further down into the ear. Avoid using smaller objects such as Q-tips as you don’t want to risk pushing them too far down into the ear.
Step 3: Dry the Ear
While you may have thought that you were done, there’s one final step to ensure clean and healthy ears. Gently swirl a dry tissue around the canal to capture any remaining moisture as leaving moisture at this point can increase the chance of infection.
Go back and repeat steps one through three for the opposite ear if you have not done so already. A similar drying process can also be useful if your Dane’s ears have become wet from activities such as swimming or bathing.
Diagnosing Ear Infections
If you’re not diligent with cleaning your Great Dane’s ears on a regular basis, then it’s likely that they will end up with an ear infection.
Common symptoms of ear infections include:
- Excessive scratching
- Brown, yellow, or bloody discharge
- Crusts or scabs on the inside of the ear
- Odor in the ear
- Redness
- Swelling
- Loss of balance
- Hearing loss
It is possible that your Dane may have an ear infection and it is time to take them to the veterinarian for further investigation. They will inspect the ear canal and drum with a magnifying ear cone, and possibly take swabs of any discharge if a bacterial infection is suspected.
Allergies, mites, wax, and yeast are all contributing factors for developing an ear infection. An accurate diagnosis is required for successful treatment due to the variety of potential causes.
If an infection is found, your veterinarian will likely prescribe oral and/or topical medications in addition to a professional ear cleaning. Know that ear infections are common, and most dogs experience one at some point in their lives.
Don’t be too hard on yourself in the event that your beloved pooch encounters one as they are not fully preventable. Unfortunately, some Danes do experience recurring infections, so maintaining a consistent grooming routine is critical to help avoid them in the first place.
If you notice a Great Dane aggressively shaking their head and ears, this is a great indicator that their ears likely need more frequent cleaning! (video below for reference)
Conclusion on Great Dane Ear Cleaning
While Great Danes are without a doubt also great babies, listen to your Dane throughout the ear-cleaning process. If they yelp in pain then it’s a sure sign that you are doing something wrong. While some do not enjoy the process, there is a big difference between annoyance and pain.
Rewarding them with treats at the end of a cleaning session is a fantastic way to ensure your Danes’s patience. Reward them with an alternative gift such as a belly rub or a trip to the park if they are not motivated by food. If this sounds vaguely familiar to getting ice cream as a child after an unpleasant event then you know exactly what I’m talking about!
Developing a consistent routine is key to ensuring compliance and long-term health. Much like teeth cleaning, starting from puppyhood is ideal as they will grow accustomed to it as part of their grooming routine from a young age.
My recommendation is to perform this task on a weekly basis, or sooner if you notice them “scratching their itch” so to speak around the ears 😉
In addition to cleaning your Great Dane’s ears on a weekly basis, there are a few other grooming steps that you should incorporate into your routine as well that are linked below.
I will be getting my Dane puppy in 2 weeks. I have a feeling your site will come in very handy. Thank you
Does it matter if the solution is listed as treating for infections as opposed to just ear cleaning solution? I am shopping around and some say ear cleaning solution and others say ear cleaning solution for infections, ticks, and mites. Will the infection cleaning solution hurt my Dane if she doesnt’t have an infection but just needs regular cleaning that she normally gets at the groomers?
Hi, what joint supplement do you recommend? My girl has just been diagnosed with arthritis.